When it comes to custom Mylar bag materials, pairing base finishes with spot finishes is a great way to make your packaging stand out and elevate the perceived product value.
Spot finishes highlight specific areas of the bag with a distinct texture or finish, creating visual contrast and a tactile experience for the customer. We have broken down some of the most popular finish types with some suggestions on how to strategically apply them.
Base Finishes
When making the right decisions for your Mylar bag project, choosing the base finish and proper sizing are equally important.
The base Mylar bag finish is a way to keep your packaging consistent with your brand and message. The base finish paired with the bag design creates the customer’s first impression.
Therefore, picking the proper base finish before implementing spot finishes could be paramount to your brand’s success.
Gloss Finish
Gloss-finish Mylar bags make up most on the market across all popular Mylar bag sectors. The shiny finish creates an eye-catching look that pops at customers.
Gloss bags are typically easier to produce than other options. As a result, they continually be a cost-effective Mylar packaging option.
Matte Finish
Matte finishes are a very popular option for custom Mylar bags. They offer a sleek and sophisticated look and feel. By muting the bag’s finish with a matte coating, these bags separate themselves from the commonly used gloss finish.
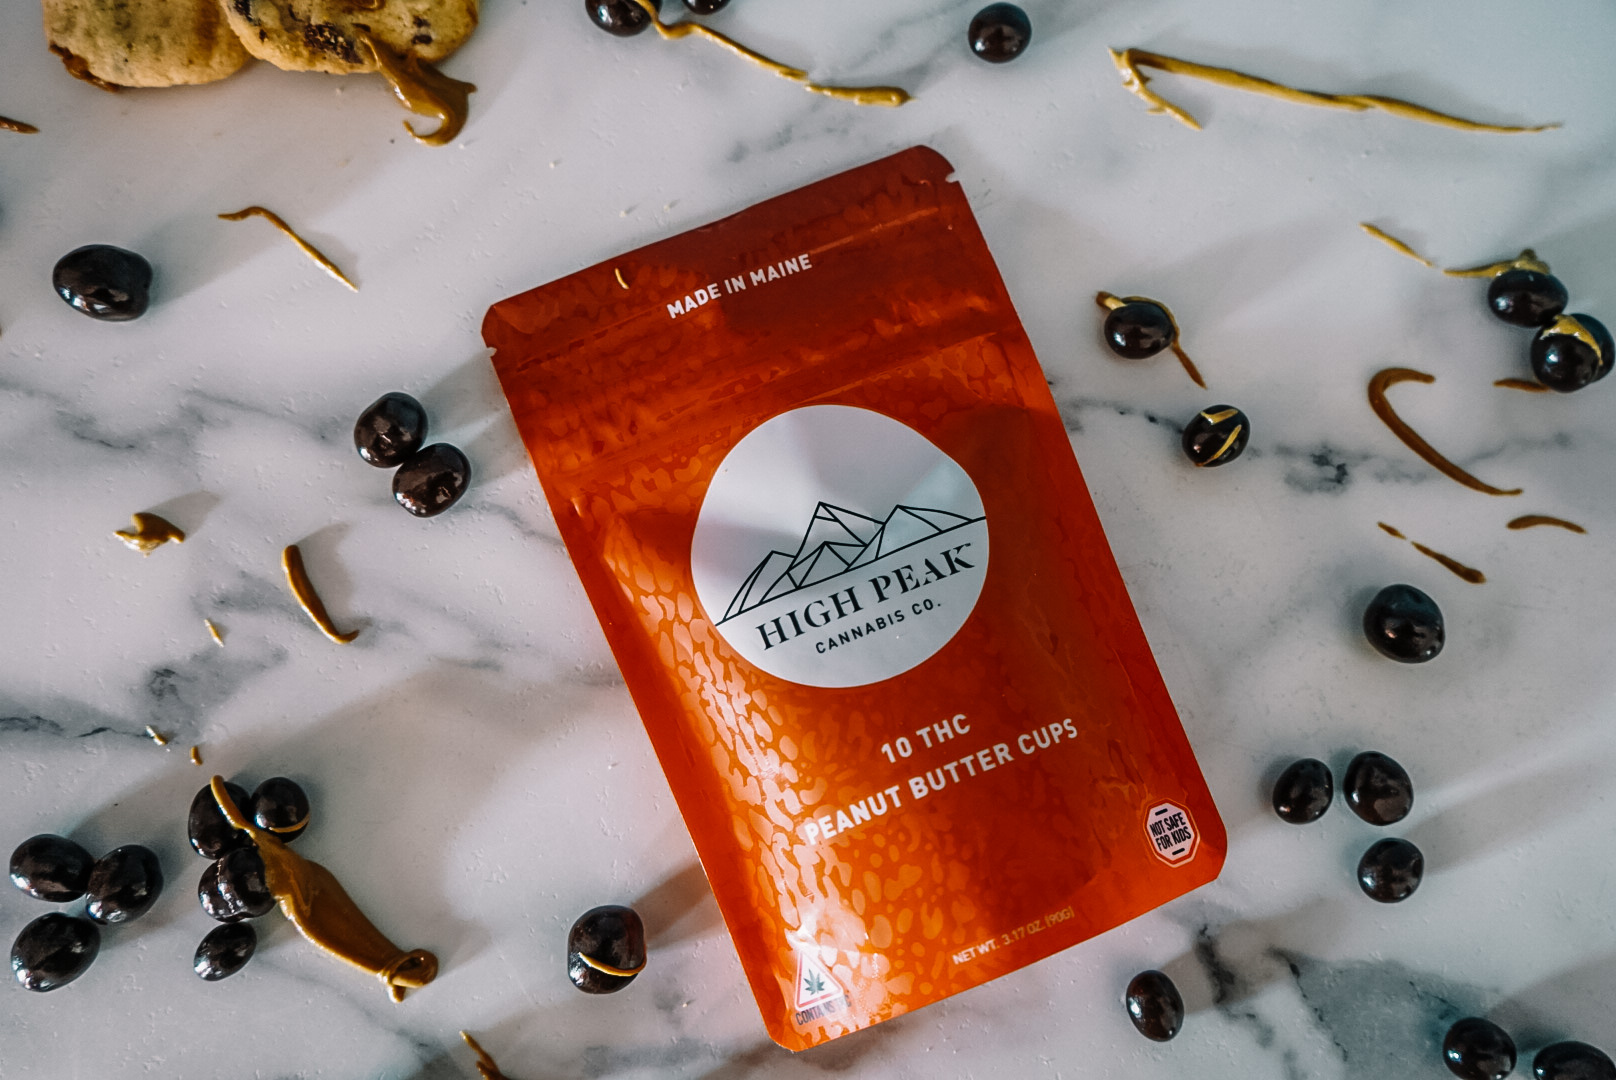
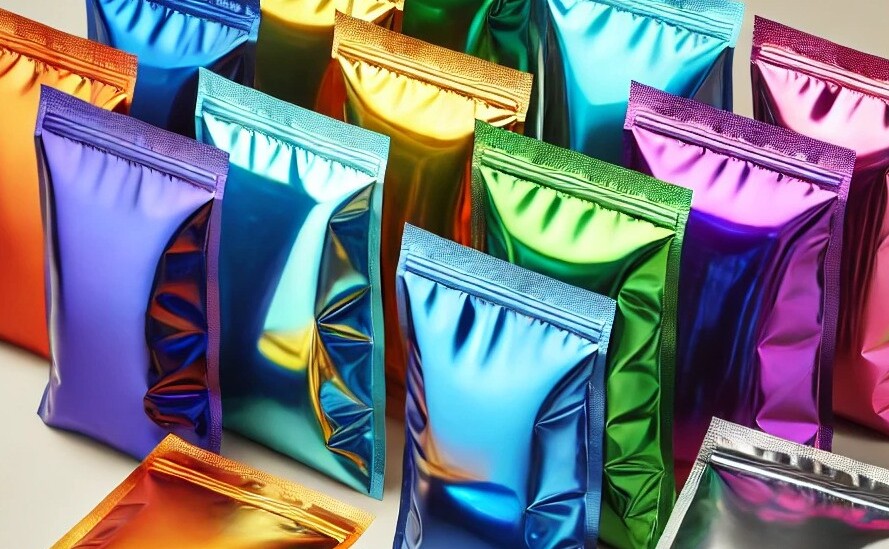
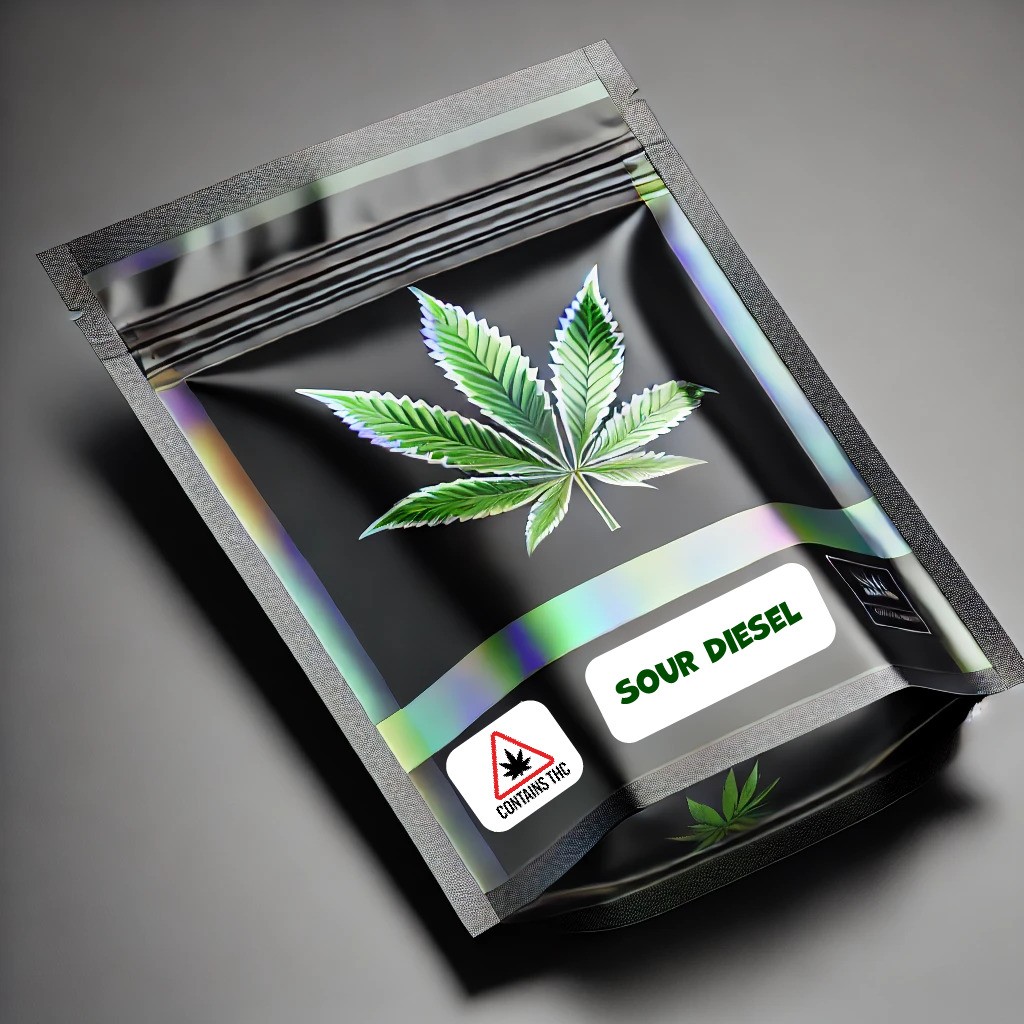
Metallic Finish
Metallic base finishes continue to grow as a popular luxury option. The process involves adding a thin layer of aluminum to the traditional PET layer to create a metallic-looking finish.
Taking these bags a step further, options like holographic metals can be used to create an even more unique and flashy look.
Soft Touch Matte
Soft touch takes a standard matte finish further by providing a more muted sheen and offering a unique feel when touched. Many customers describe the touch sensation as subtle velvety.
This option is ideal for clients concerned with the look and actual feel of the mylar bag.
Matte Metallic
As brands look to continuously differentiate themselves, finish types like Matte Metallic have become more popular. These are a great way to utilize the luxury feel of metal and add a slightly muted look for a soft sheen. Matte metallic Mylar bags provide a one-of-a-kind elegant look and feel.
Gloss Metallic
Gloss Metallic finishes are a less mainstream look and are more common for brands trying to create a flashy look and feel. This combination creates an ultra-shiny appearance. Paired with metallic finishes (i.e. holographic), this finish combo will stand out.
Spot Finishes
Using spot finishes on custom Mylar bags is the ultimate way to set your brand apart. Spot finishes are a chance to add a personal touch or create a unique packaging experience for the end consumer.
Utilizing spot finishes within design elements can help achieve a unique layered look. More specifically, they’re ideal for making elements like logos and important text stand out from the rest of the bag.
Spot finishes are your opportunity to create contrast within your design. Furthermore, to make the right elements pop or mute areas you would like more subdued.
Some spot finishes can even be paired together to create the ultimate special effect on your Mylar bag.
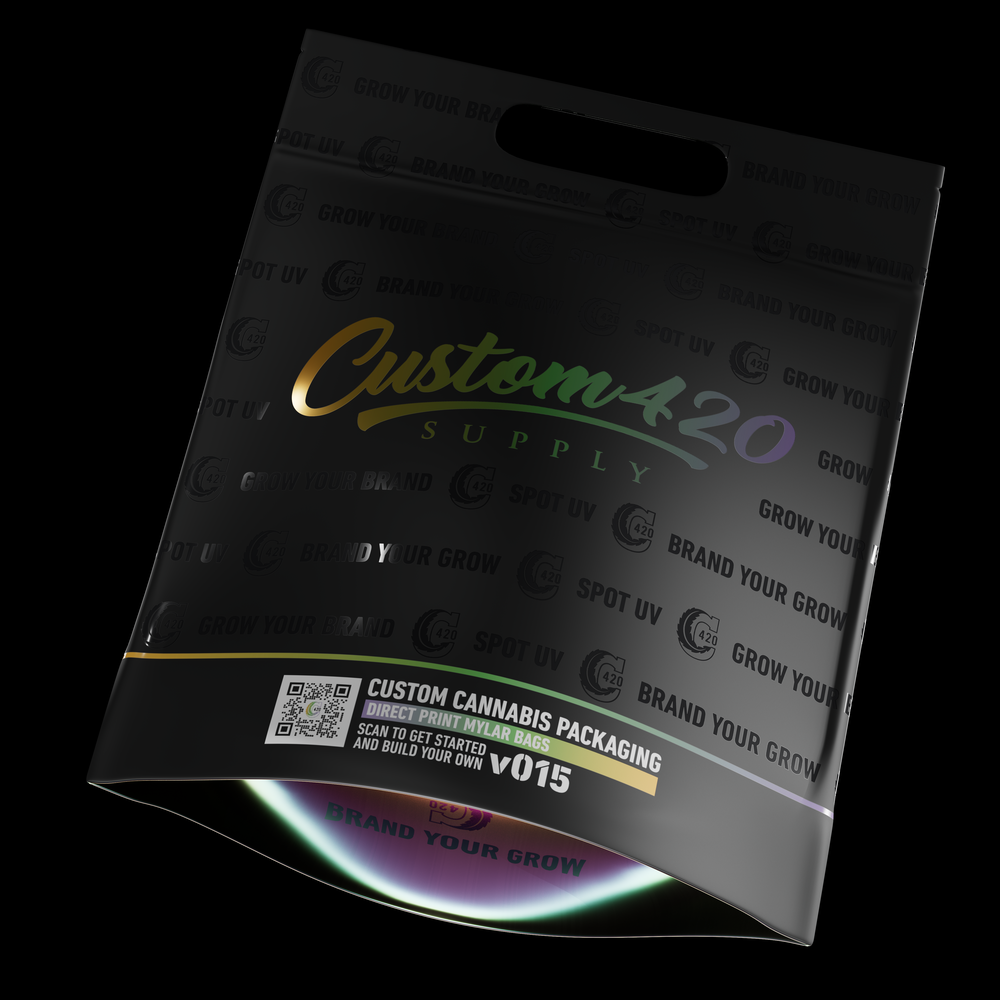
Spot UV
Spot UV (or Spot Gloss) is a gloss UV coating applied to a specific area of your Mylar bag. This spot finish is used against a matte base finish to highlight specific elements or a unique pattern on your bag design and make it pop.
Spot Matte
This is the opposite of a Spot UV (gloss) finish and in conjunction with a bag that utilizes a gloss or metallic base finish. Integrating a Spot Matte layer, you mute the sheen of specific areas of the bag to make portions of the base finish appear more prominently.
Like Spot UV this is often utilized to create unique patterns for a one-of-a-kind design.
Spot Foil
In essence, this would be used to add a metallic spot finish over your base finish. Spot Foiling (or foil stamping) is typically for very specific elements within the bag to make it stand out. For example, displaying a logo and/or tagline in foil to contrast with the base layer.
This spot finish works best on a matte base layer but also works with gloss.
Embossing
This type of spot finish would inherently involve printing the same spot finish as the base layer on top of each other to create a raised look and feel. For example, you can print your logo in gloss on top of the gloss base finish to make your logo slightly elevated from the base layer.
Alternately embossing can be combined with another type of spot finish to maintain its raised feel. It can also add the contrast of a varying finish against the base finish.
Final Word
You can combine gloss and matte finishes on Mylar bags or stick with one. Companies can create visually striking packaging that aligns with brand identity. By choosing the right base finish and adding spot finishes, brands can:
Enhance visual appeal and texture
Highlight key elements
Make products stand out
This layered approach boosts shelf presence, reinforces brand recognition, and creates a memorable customer experience.
Not sure what the best option is for your brand? Custom 420 is here to help. We invite you to reach out through our contact form to learn more.
Your custom weed bags are more than just a way to preserve freshness. They’re your brand identity. Therefore, it’s in your interest to define the visual of this packaging. But what are the marketing purposes of these bags and how should you identify them?
First Impressions are Everything
Your marijuana packaging defines the product inside. Why? Custom cannabis bags act as your brand’s first impression. They establish the foundation for your customer relationship.
Naturally, there are a million ways you can go about your cannabis bag design. This will set the tone for your identity, it will implement your brand’s narrative, value, and quality.
Craft Your Brand’s Visual Identity
Personalization is the essence of uniqueness. By customizing your weed packs, you have the potential to reflect your brand’s voice.
Think about the tone you want to give to the customer. Are you a luxurious brand? Do you sponsor eco-friendly solutions? Are your products innovative and bold?
Whatever the case, custom weed bags ensure you get this image through to your customer.
Your Personalized Weed Bag is Your Brand Advocate
Whenever a customer purchases your product, the packaging alone becomes a free advertisement for others to see. Since traditional forms of advertisement are restricted in the cannabis industry, such exposure is everything.
Perception is Paramount
We’ve established that you want to leave a good first impression on customers. However, this impression will go beyond an initial reaction. It’s largely how your brand is perceived.
Perception is everything. Exotic weed bags with a thoughtful design suggest a higher-quality product. It softly notes that this product was crafted with tender love and care.
The Importance of the Environment
As the cannabis industry continues to expand, more are after brands that incorporate eco-friendly packaging materials. Beyond trends, this shows that you are a conscientious brand. That you care about your impact on the planet and, therefore, the quality of the products you supply.
Foster Loyalty with Unique Experiences
While personalized weed bags are great for first impressions, they can also ensure customer loyalty. The right customization can make customers feel they belong and are exclusive to a group. Such a mindset will ensure brand loyalty and ensure continuous purchases.
The Importance of Social Media
Is your custom bag of weed eye-catching? Does it have the type of design people want to share on their social media platforms?
You better hope so. Social media has become one of the most effective marketing tools out there. While your own social media strategy may be effective, nothing is as worthwhile as word of mouth.
In fact, a 2021 Nielson study found that 77% of customers are more likely to buy a product if their friends recommended it. Therefore, it’s in your interest to design a bag that will be shared across social media.
Safety First
Still, as important as brand identity is, it’s equally as important to ensure your packaging follows federal and state compliance laws. Since the cannabis industry is so new, people put their trust in brands that can leverage these regulations.
While each state is different, common requirements include:
Additive or contaminant information
Batch, license, and serial number of the cultivation facility
Custom weed bags are just containers for your cannabis, they’re a blend of utility, style, and ideology. Therefore, it’s in your interest to ensure your bags are customized with perfection. Not sure where to begin? That’s where Custom 420 comes in. If you want to learn more, we invite you to reach out through our contact form.
Personalized Weed Bags FAQs
What are weed bags called?
The term “weed bags” can refer to various packaging options. However, in most cases, it’s referring to Mylar bags. These are a popular solution as they’re odor-resistant, opaque, sturdy, and fairly impermeable.
How do weed bags work?
Weed bags protect the freshness of cannabis and preserve its odors.
How long does weed in a bag last?
While this depends on the type of bag used, most Mylar bags ensure cannabis stays fresh and potent for many months or even years.
When selecting the perfect finish for your printing projects, deciding between gloss vs. matte laminate is crucial. Each finish offers unique benefits and aesthetic appeals, making them suitable for various applications. This article provides a detailed comparison to help you make an informed decision tailored to your packaging needs.
Understanding Gloss Laminates
Gloss laminates are renowned for their vibrant and shiny finish. This type of laminate is ideal for enhancing the color depth and vibrancy of printed materials. The reflective surface adds a dynamic visual appeal and draws attention, making it a popular choice for marketing materials such as brochures, photos, and covers.
Benefits of Gloss Laminate:
Enhanced Color and Brightness: Gloss laminate amplifies the colors of the underlying print, making images appear more vivid and striking. This can be particularly beneficial for graphical prints where high impact is desired.
Durability and Protection: The shiny surface of gloss laminate is less prone to scratching and dirt, providing excellent protection for frequently handled items.
Professional Appearance: Glossy finishes are often associated with a more professional and polished look. This is essential for business presentations or promotional materials.
Exploring Matte Laminates
Matte laminate offers a subtle, elegant finish perfect for those seeking a more understated look. Unlike its glossy counterpart, matte laminate reduces glare and reflection, which makes it an ideal choice for products that require frequent viewing under varied lighting conditions.
Benefits of Matte Laminate:
Reduced Glare: The non-reflective surface ensures that documents and materials are easier to read, even under intense light.
Fingerprint Resistance: Matte finishes are better at hiding fingerprints and smudges, maintaining a clean and professional appearance over time.
Sophisticated Visual Appeal: The soft and smooth texture of matte laminate adds a layer of sophistication, enhancing the overall aesthetic of printed materials.
Incorporating Laminate Choices into Design
Understanding the impact of each laminate type on the final product is essential for designers. It’s important to consider each finish’s aesthetic aspects and practical implications. For instance, while gloss might enhance the colors of a design, it could also introduce issues with glare under certain lighting conditions. Similarly, while matte might enhance readability, it may also mute certain colors and details.
Optimizing Your Print Materials for Desired Outcomes
To maximize the effectiveness of your printed materials, consider the following tips:
Test Different Laminates: Before finalizing your print order, test both gloss and matte finishes to see which brings out the best in your design.
Consult with Professionals: Graphic designers and printing experts can provide valuable insights into which laminate would best suit your project’s needs.
Consider Your Audience/Brand: Consider the preferences and expectations of your audience. What finish would they find most appealing or appropriate?
Conclusion
Choosing between gloss vs. matte laminate involves more than just aesthetic preference; it requires thoughtful consideration of how each finish will enhance the functionality and appeal of your printed materials. Whether you aim for durability and vibrancy with gloss or sophistication and readability with matte, the right choice will elevate your project and ensure it makes the lasting impression you desire.
Choosing the right materials for your custom cannabis label solutions can feel overwhelming. Notably, if you’re unfamiliar with all the options available.
The first thing you need to ask yourself is, “How will these labels be used?” Secondly, consider “What type of look am I going for?”
Once you’ve answered these questions, you’ll have a solid foundation for selecting the right functional and aesthetic materials. But let’s break it down further by exploring some of the most common options for label solutions and how they fit into 420 packaging.
1.) BOPP (Biaxially Oriented Polypropylene)
BOPP is a popular choice in custom dispensary packaging because of its strengths and adaptability.
Advantages
Durability – Resistant to water, oil, and chemicals—perfect for weed packaging labels.
Clarity – High transparency and glossy finish create a premium appearance.
Flexibility – Ideal for food, beverages, health, beauty, and custom packaging labels.
Printability – Allows for crisp, high-quality graphics that make your weed label stand out.
Disadvantages
Cost – More expensive than standard paper labels.
Environmental Impact – A plastic-based material, it’s not the most eco-friendly option.
2.) Vinyl
Vinyl labels are an excellent choice when durability is a priority. If your product needs to withstand tough conditions, vinyl might be your best bet.
Advantages
Extreme Durability – Resistant to water, UV rays, and abrasion.
Flexible Application – Works well on curved or irregular surfaces.
Strong Adhesion – Stays put on even the trickiest of packages.
Disadvantages
Cost – Typically pricier than BOPP and paper labels.
Not Biodegradable – Like BOPP, vinyl isn’t the most eco-friendly option.
3.) Foil
Want to make your packaging shine? Foil labels bring an eye-catching, premium look to your custom cannabis label solutions.
Advantages
Luxury Appeal – Metallic sheen adds a high-end, attention-grabbing finish.
Resilient – Resistant to moisture, oils, and some chemicals.
Barrier Properties – Helps protect contents from light and oxygen exposure.
Disadvantages
Higher Cost – More expensive due to material and processing.
Limited Flexibility – May not conform to all packaging surfaces.
4.) Paper
Paper labels are the most economical choice and are great for brands looking for an eco-friendly and cost-effective custom dispensary packaging solution.
Advantages
Budget-Friendly – The most affordable label option.
Excellent Printability – Provides a clean, high-quality print surface.
Eco-Conscious – Biodegradable and recyclable—ideal for sustainable brands.
Disadvantages
Less Durable – Not resistant to water, oil, or tearing.
Limited Applications – Not suitable for outdoor or high-moisture environments.
Which Label Material is Right for You?
Choosing the perfect label material depends on your specific needs. Whether you’re focused on durability, aesthetics, cost, or sustainability, there’s a solution that fits.
If you need expert guidance on selecting the best weed packaging labels for your brand, we’re here to help. We specialize in custom cannabis label solutions and offer a variety of custom packaging labels to suit any product. Contact us today to explore the best labeling options for your business!
Die-cut boxes are a popular choice in the world of packaging as they offer a unique blend of aesthetic appeal and functional design. However, you may wonder if they’re the right packaging solution for your cannabis brand.
In this article, we’ll explore how you can get creative with die-cut, enhancing both the unboxing experience and the visual branding of your products.
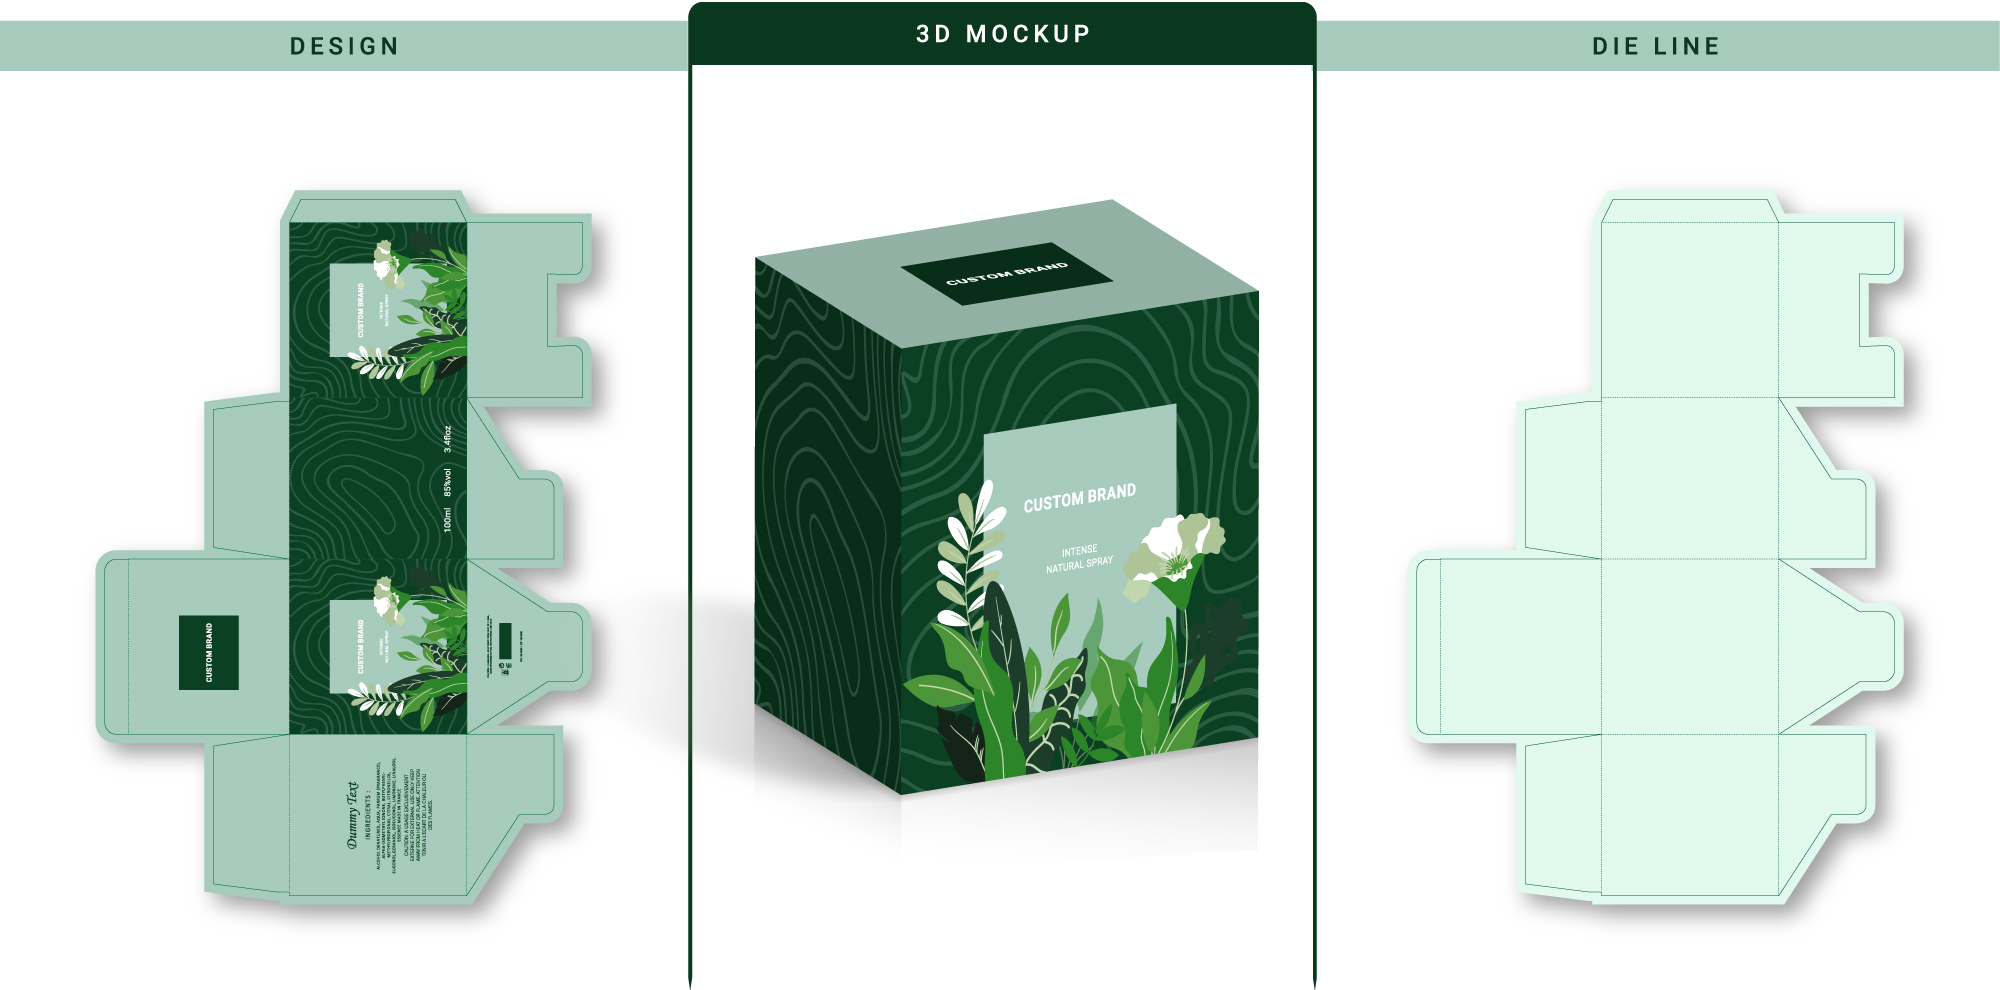
What is a Die-Cut Box?
Die-cut boxes are custom-made packaging solutions, tailored to fit specific dimensions and protection needs.
These boxes are cut from flat sheets of material using a die; a specialized tool crafted to cut and score cardboard in a predefined design. This process allows for intricate cutouts, windows, and unique box shapes that are unachievable with standard box-making techniques.
Benefits of the Die-Cut Box
A die-cut box template offers several compelling advantages for businesses and designers alike:
Customization –The ability to fully customize a box’s shape, size, and features.
Protection – Enhanced protection due to the precise fit around the product.
Aesthetics – Attractive and distinctive designs that stand out on shelves and in customers’ hands.
Designing Your Die-Cut Box
Creating a die-cut box design that perfectly matches your vision involves several steps:
Understanding Your Needs – Start by defining your box’s purpose. Consider the product’s dimensions and weight and how the box will be used during shipping and retail display.
Choose the Right Material – Select materials that will protect your product and align with your brand’s sustainability ethos. Cardboard, corrugated fiberboard, and recyclable plastics are popular choices.
Customization Techniques – Leverage techniques (i.e. digital or offset printing, embossing, debossing, and window patching) to add branding elements and decorative features.
Add Unique Features – Think beyond the box. Literally. Add handles for easy carrying, innovative closures for repeated use, or die-cut window patterns that give a peek of the product inside.
Creative Uses of Die-Cut Boxes
Custom die-cut boxes are adaptable for a multitude of applications across various industries:
Retail Packaging – Create packages that protect merchandise and enhance shelf presence with custom shapes and designs.
Wholesale Boxes – Easily create wholesale master boxes to coordinate branding between retail and wholesale packaging.
Subscription Boxes – Offer subscribers a unique unboxing experience every time, with designs that evolve with themes or seasons.
Eco-Friendly Solutions – Design your boxes with sustainable materials and processes to appeal to eco-conscious consumers.
Marketing Benefits
Innovative packaging can significantly boost your product’s visibility and brand recognition. They make your product stand out in a crowded market, and the unique design can turn ordinary packaging into a powerful marketing tool.
Die-cut boxes are more than just containers; they’re critical to product presentation and brand perception. Furthermore, by getting creative with your design, you can deliver an unforgettable unboxing experience and establish a strong visual identity.
Not sure where to begin? Custom 420 has a die-cut box machine for the purpose of offering such solutions to brands like yours. We invite you to reach out through our contact form to learn more.
Frequently Asked Questions
How to assemble a die-cut box?
The process of assembling a die-cut box is easy. Die-cut boxes are produced as flat cardboard with all the fold and score lines intact after production. The most popular style of die-cut box is a fold-and-tuck box which is easily assembled by folding and tucking the cardboard in the shape of the die lines to form your box.
How much do die-cut boxes cost?
Die-cut boxes are one of the most cost-effective box options on the market. The price of your die-cut box will be determined by the size, thickness, and quantity of your box. Other factors that help determine the cost are the need for features like glue strips or windows.
How to layout a die-cut box in Illustrator?
To make die-cut lines in Illustrator, you’ll want to follow these steps: 1.) Open your design in Illustrator. 2.) Go to Select > All. 3.) Go to Object > Group. 4.) Go to Edit > Copy and then to Edit > Paste in Place. 5.) Go to Window > Pathfinder and press the “unite” icon. 6.) Go to Object > Path > Offset Path. 7.) Choose the initial shape and remove it. 8.) Select the offset path you just created and in the Swatches panel (Window > Swatches), set the fill to “none.” 9.) Click on the Stroke icon to activate the stroke color, then set it to “CMYK Cyan” (or another color).